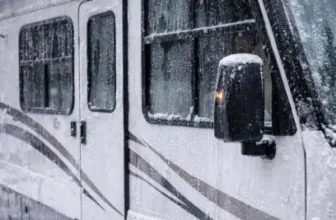
Water is one of the biggest enemies of any RV. A small leak can turn into a big problem fast. The worst part? You may not see the damage right away. Moisture can hide inside your RV walls for weeks or even months before you notice it.
If you care about comfort, air quality, and protecting your bed area, it is important to know the early signs of trouble. Hidden moisture damage can even affect the space around your RV sleep setup and cause mold near your mattress platform.
In this guide, you will learn the warning signs, how to check your RV walls, and how to stop small problems before they become expensive repairs.
Why RV Walls Get Moisture Damage So Easily
RV walls are not built like house walls. They are thinner and lighter. Many are made with wood framing, foam insulation, and thin wall panels pressed together. This makes them strong but also easier to damage if water gets inside.
Here are common ways water sneaks in:
- Cracked roof sealant
- Leaky windows
- Slide-out seals
- Marker lights
- Plumbing leaks inside walls
- Poor ventilation causing condensation
Even everyday living can cause moisture problems. Cooking, showering, and breathing all create humidity. If air cannot move freely, moisture builds up inside walls. This often happens behind beds, under bunk pads, and around the RV mattress platform.
Early Signs of Hidden Moisture Damage in RV Walls
Catching the problem early can save you thousands of dollars. Here are the most common warning signs.
1. Soft or Spongy Walls
Press gently on your walls, especially:
- Around windows
- Near the ceiling
- In corners
- Behind your headboard
If the wall feels soft or spongy, that is a red flag. Solid walls should feel firm. Soft spots usually mean water has soaked into the wood inside.
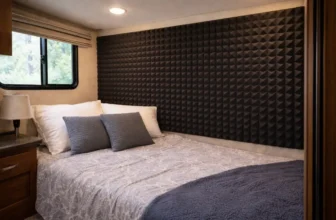
This is especially common near the bed area where airflow is limited.
2. Wall Stains or Discoloration
Water often leaves marks. Look for:
- Yellow or brown stains
- Dark streaks
- Faded patches
- Water rings
These stains may appear small at first. Do not ignore them. Even a tiny stain can mean water is trapped behind the panel.
Check closely around your RV mattress base and near overhead cabinets.
3. Bubbling or Peeling Wall Covering
Many RV walls have vinyl wallpaper. When moisture gets behind it, you may see:
- Bubbling
- Wrinkles
- Peeling seams
- Loose trim
This happens because the glue weakens when it gets wet. If you see bubbling near your sleeping area, inspect right away.
4. Musty Smell
Sometimes your nose finds the problem before your eyes do.
A damp, musty smell inside your RV often means hidden moisture. The smell may be stronger:
- Inside cabinets
- Under beds
- Behind cushions
- Near slide-outs
If your RV sleep space smells musty in the morning, it could be condensation building up overnight.
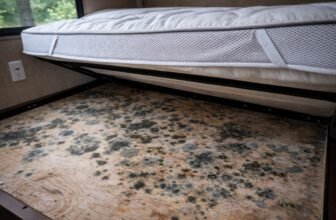
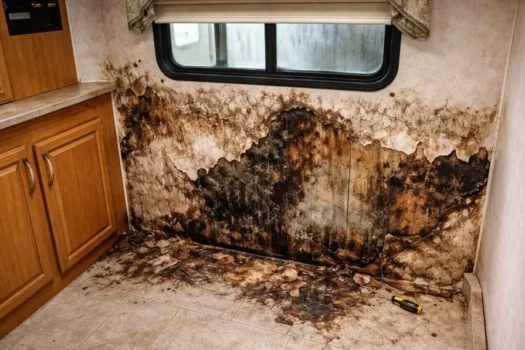
5. Mold Spots
Mold can appear as:
- Black dots
- Green patches
- Gray fuzz
You may find it in corners, near ceiling joints, or behind your mattress platform. Mold grows fast in dark, damp places. Even small spots mean moisture has been present for a while.
6. Delamination on Exterior Walls
Delamination is when the outer wall looks wavy or bubbled. This happens when water breaks down the glue inside laminated walls.
Stand at an angle and look down the side of your RV. If the wall looks uneven or swollen, moisture may be trapped inside.
This is a serious sign and should not be ignored.
Advanced Signs of Structural Damage
If moisture has been present for a long time, the damage becomes worse.
1. Rusted Screws or Fasteners
Look at screws near windows, light fixtures, and wall trim. If they are rusty, water may be inside the wall.
Rust inside an RV is never a good sign.
2. Cracks Between Wall and Ceiling
If you see gaps where the wall meets the ceiling, the structure may be weakening. Water can soften framing and cause movement.
3. Electrical Problems
Water and wiring do not mix. Watch for:
- Flickering lights
- Dead outlets
- Corroded outlet covers
If these happen near your RV mattress area or sleeping wall, inspect immediately.
Hidden Areas Many RV Owners Miss
Moisture often hides where people rarely check.
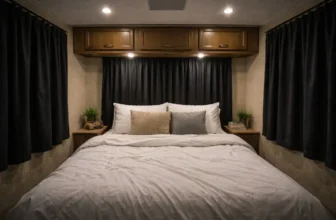
Behind the Bed
The space between the wall and mattress platform is one of the most common moisture zones. Warm air from your body meets a cool exterior wall. This creates condensation overnight.
Pull the mattress out every few weeks and check for dampness.
Under Bunk Pads
Bunk beds often sit against outside walls. Without airflow, moisture builds quickly.
Inside Exterior Cabinets
Open cabinets that touch outside walls. Feel the back panel for coolness or damp spots.
Around Slide-Out Corners
Slide-outs are known for seal issues. Inspect the lower corners and floor edges carefully.
How to Inspect RV Walls for Moisture Damage
You do not need fancy tools to start.
Step 1: Visual Check
Look for stains, bubbles, and discoloration.
Step 2: Press Test
Push gently on walls. Soft spots are warning signs.
Step 3: Smell Test
Notice any damp odors, especially near your RV sleep setup.
Step 4: Use a Moisture Meter
A small handheld moisture meter can detect hidden water inside walls.
Step 5: Check Exterior Seals
Look at roof seams, window seals, and caulking. Cracks allow water in.
What to Do If You Find Moisture Damage
Your next steps depend on how bad the damage is.
Minor Problems
If you catch it early:
- Reseal roof and window seams
- Dry the area with fans
- Use a dehumidifier
- Improve airflow around the mattress platform
Sometimes this is enough.
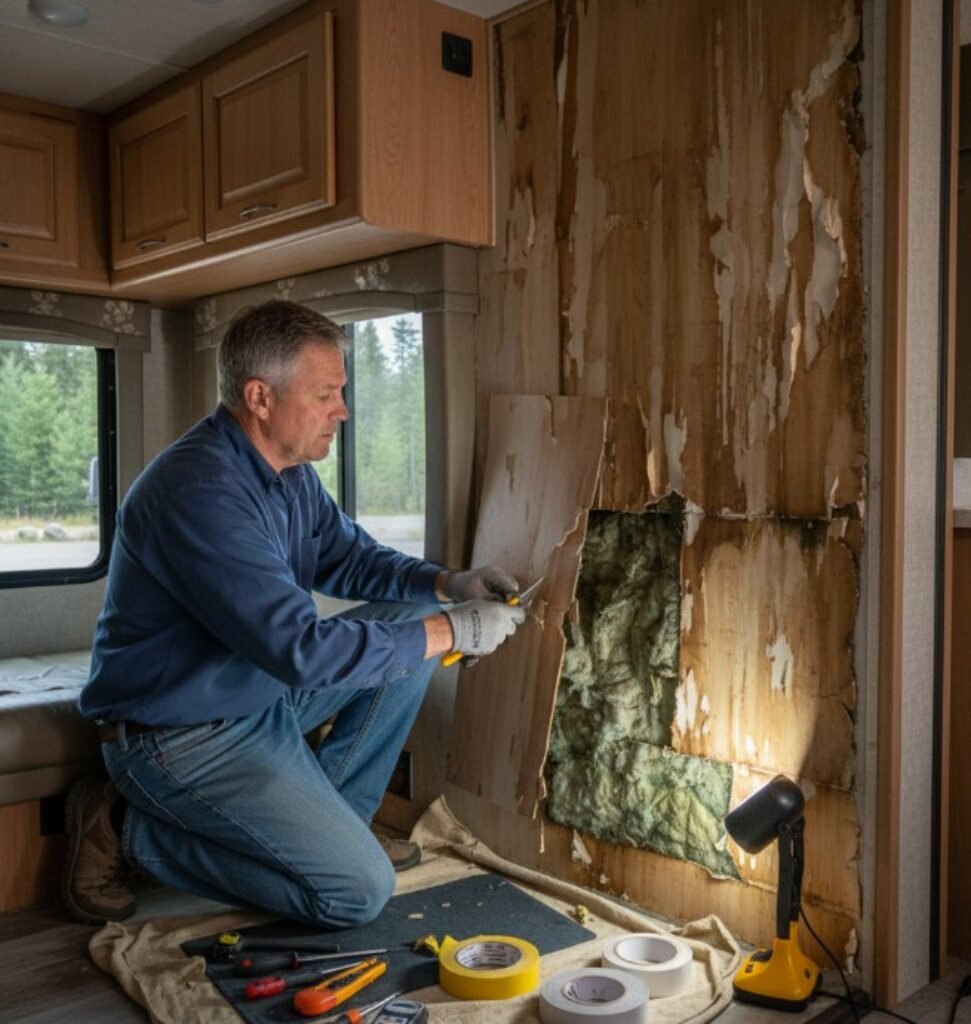
Moderate Damage
If walls are soft but not collapsing:
- Remove the interior panel
- Replace wet insulation
- Let framing dry completely
- Install new paneling
Always fix the leak source first.
Severe Damage
If framing is rotten or walls are separating, you may need professional help. Structural repairs can be complex.
Do not delay. The longer you wait, the worse it gets.
How to Prevent Moisture Damage in RV Walls
Prevention is much easier than repair.
1. Inspect Seals Twice a Year
Check roof seams, windows, vents, and slide-outs. Reseal cracks right away.
2. Improve Ventilation
- Open roof vents
- Use vent fans
- Crack windows slightly when weather allows
Air movement reduces condensation near your RV mattress area.
3. Increase Airflow Under the Bed
Lift the mattress weekly. Consider adding:
- Slatted bed bases
- Ventilation mats
- Small spacers between the wall and mattress
This protects both your RV sleep comfort and wall panels.
4. Use a Dehumidifier
A small RV-sized dehumidifier removes extra moisture from the air. This helps prevent mold and wall damage.
5. Monitor Interior Humidity
Keep humidity between 30% and 50% if possible. High humidity leads to condensation on cool walls.
Why This Matters for Comfort and Health
Hidden wall moisture does more than damage wood. It can:
- Create mold spores in the air
- Cause bad odors
- Damage insulation
- Affect the area around your RV mattress
Good air quality is important for healthy RV sleep. Moisture control helps you rest better and protects your investment.
Final Thoughts
Water damage rarely starts big. It begins with a small crack or tiny leak. Over time, moisture spreads inside the walls where you cannot see it.
By checking for soft spots, stains, musty smells, and bubbling panels, you can catch problems early. Pay special attention to the bed area, bunk pads, and exterior walls.
A few minutes of inspection every month can protect your RV, improve comfort, and prevent costly repairs.
If you stay proactive, your walls will stay strong, your air will stay fresh, and your RV sleep space will remain clean, dry, and comfortable for years to come.