 Mike Lee
You pulled up the cushion to grab something, and there it was. A dark, damp patch under your bed. Maybe a musty smell too. Maybe even a little fuzzy mold creeping in.
It feels gross. And honestly, it can feel a little scary, like something is wrong with your camper.
But take a breath. This happens in almost every camper, and it’s an easy fix. You don’t need a new bed, and you don’t need to spend a lot. Most people solve it with a breathable underlayment that costs somewhere between $40 and $120.
Here’s the short answer before we go deeper: a mesh-style breathable underlayment, like Hypervent or Dri-Deck, is the best pick for most campers. It’s cheap, easy, and it just works.
Now let’s talk about why this happens and how to stop it for good.

What Is a Breathable Underlayment for Camper Beds
Let’s clear up the fancy word first.
An “underlayment” is just the layer you put between your bed and the wood platform under it. That’s it. It sits underneath and lets air move around.
A “breathable” one has gaps or channels built in. Those gaps let air flow under your bed so moisture can dry out instead of getting trapped.
Think of it like the little feet on the bottom of a laptop. They lift it up just enough so air can move and it doesn’t overheat. A breathable layer does the same thing for the bottom of your bed.
Without it, your bed sits flat on solid wood. Warm body on top, cold wood below, and no place for the wetness to go. So it sits there. Night after night.
Camper Bed Gets Damp and Moldy Underneath
This part trips up a lot of folks, so let’s keep it simple.
Your body is warm. The wood platform under your bed is cold, especially at night or in cooler weather. When warm, wet air from your body hits that cold surface, it turns into water. This is called condensation.
You’ve seen this before. It’s the same thing that happens when a cold soda can “sweats” on a hot day. Tiny drops of water show up on the outside.
Under your bed, that water has nowhere to dry out. It’s squished between your foam and the wood. So it builds up, and over time you get damp spots, a musty smell, and yes, sometimes mold.
It’s not because you did anything wrong. It’s just how a closed-up sleeping space behaves. The good news. Moving air fixes almost all of it.
What to Look For in a Mattress Underlayment for Campers
Not every option is the same. Here are the things that actually matter when you shop.
- Airflow gap: How much space does it open up under your bed? More space means more drying.
- Material: Some are tangled mesh, some are hard plastic tiles, some are wood slats.
- Thickness: Most add about half an inch to an inch. You won’t really notice it when you climb in.
- Cut-to-fit: Can you trim it with scissors or a knife to match your odd-shaped bunk? Camper beds are rarely a perfect rectangle.
- Price: Most good options run $40 to $120 for one bed.
You don’t need the most expensive one on the shelf. You just need air moving under there. Keep that in mind and you’ll be fine.
Best Underlayment Options for an RV Bed
Let’s go through the main choices. I’ll give you my honest call on each one, plus a rough price.
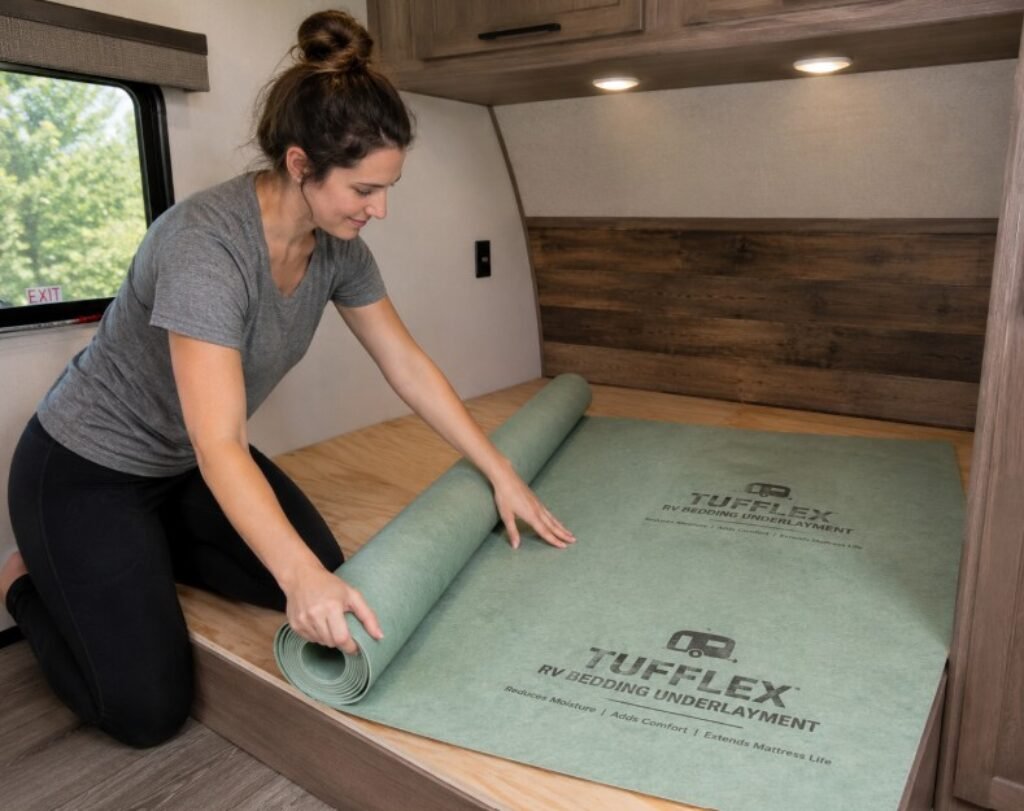
Hypervent and mesh matting (best for most people). This is a roll of tangled, springy mesh, kind of like a giant pot scrubber pressed flat. You roll it out, cut it to size, and lay it shiny mesh up. It costs around $40 to $90 depending on size. It’s light, easy, and it works in almost any rig. For most campers, this is the sweet spot.
Dri-Deck and interlocking tiles (best for wet climates). These are hard plastic tiles that snap together like a puzzle. They lift your bed higher and let a lot of air through, which is great if you camp somewhere humid or rainy. They cost about $50 to $120. The trade-off is more setup time, and the surface is firmer underneath.
Froli sleep system (the comfy splurge). This is a grid of little plastic springs that clip together. It breathes well and adds real comfort, almost like a bed of soft buttons under your foam. The catch is the price, usually $200 and up. It’s a great pick if you sleep in your camper a lot and your back needs the help.
DIY cedar or wood slats (the budget route). You can build a simple slatted base with thin wood strips and small gaps between them. Cedar even smells nice and fights moisture a bit. This can cost under $30 if you’re handy. The downside is the work, and the support isn’t always even, so cheap thin slats can sag.
A moisture pad by itself (skip this one). Some folks buy a flat foam or rubber pad and call it done. But a pad with no airflow doesn’t really help. If air can’t move, the water still gets trapped. Save your money for something with real gaps.
How to Pick the Right Camper Bed Airflow Layer for You
So which one should you grab? Let’s make it easy.
If you want simple and cheap, get mesh matting. It fits almost every situation and you can install it in ten minutes.
If you live somewhere wet or your camper sits in damp weather a lot, go with the snap-together tiles for that extra airflow.
If comfort matters most and you’ve got room in your budget, the Froli system is worth it.
And if money is tight and you like building things, the wood slat route gets the job done.
For most readers, here’s my pick: start with mesh matting. It solves the problem for the least money and the least hassle.
How to Install Your Breathable Camper Bed Underlayment
Putting it in is easier than you’d think. Here’s the quick version.
First, take the foam off and measure your platform. Write the numbers down so you don’t guess.
Next, lay your mesh or tiles out and trim them to fit with scissors or a utility knife. Leave a small gap of about an inch around the edges so air can sneak in and out.
Then make sure you put it the right way up. For most mesh, the springy bumpy side faces up toward your foam. Check the package, since brands can differ.
Last, drop your foam back on top. That’s the whole job. No tools beyond scissors for most setups.
Easy Tips to Keep Your Camper Bed Dry
A breathable layer does most of the work, but a few small habits help even more.
Wipe down the wood platform when you do a deep clean. Get rid of any moisture already sitting there.
On travel days, stand the foam up on its side for an hour or two and let both sides air out. Cracking a window or running a small fan helps too.
If you camp in cold weather, try not to let the inside get too steamy from cooking or showers. That extra steam adds to the problem.
None of this is hard. A little air and a little attention go a long way.
FAQs About Camper Bed Underlayment
Will this fully stop mold? It stops most of it. Airflow keeps things dry, and dry surfaces don’t grow mold. Just stay on top of the easy habits above.
Can I just use a regular bed pad? Not really. A plain pad with no gaps traps water instead of drying it. You want something with built-in airflow.
Will my bed feel less comfy? No, you won’t notice it. The layer is thin, and your foam still feels the same when you lie down.
How often do I replace it? Mesh and tiles last for years. Rinse them off now and then, let them dry, and they’re good to go.
Does it work in cold weather too? Yes. Cold weather is actually when damp spots show up most, so the airflow helps even more then.
The Bottom Line
Don’t let a damp, musty bed stress you out. It’s a normal camper problem, and the fix is cheap and simple.
Measure your bed platform tonight. Check if any air can move under there. If it can’t, start with a roll of mesh matting and go from there.
You’ve got this. A few dollars and a few minutes, and your bed stays dry and fresh.