If you’ve ever slept on a factory RV mattress, you know the problem. What looked fine at the dealership can quickly turn into a lumpy, sagging mess. You wake up sore, tired, and wondering how something meant for travel could feel so uncomfortable.
The good news? You don’t need to spend hundreds or thousands of dollars on a brand-new bed. There are simple, affordable ways to fix a lumpy RV mattress and sleep better on the road.
This guide walks you through why RV mattresses get lumpy, how to diagnose the real issue, and budget-friendly fixes that actually work.
Why Factory RV Mattresses Get Lumpy So Fast
Most RV manufacturers cut costs wherever they can, and mattresses are one of the first places they do it.
Here’s why lumps happen:
Low-Density Foam
Many factory RV mattresses use cheap foam that breaks down quickly. After a few trips, the foam compresses and never springs back.
Thin Mattress Layers
RV mattresses are often thinner than home mattresses to save weight. Less foam means less support, which leads to uneven spots.
Weak Bed Platforms
Some RV beds sit on plywood with gaps, slats, or uneven boards. Even a decent mattress will feel lumpy on a bad base.
Moisture and Humidity
RVs trap moisture. Over time, damp air weakens foam and causes uneven wear underneath the mattress.
Check These Things Before You Spend Any Money
Before buying anything, take a few minutes to inspect what you already have.
Look at the Mattress
- Are the lumps in one spot or everywhere?
- Does the foam stay compressed when you press it?
If it doesn’t bounce back, the foam is worn out.
Check the Bed Base
Lift the mattress and inspect the platform. Look for:
- Gaps between boards
- Sagging plywood
- Broken or uneven slats
Many “mattress problems” are actually base problems.
Rotate or Flip the Mattress
Some RV mattresses can be rotated head-to-foot. A few can be flipped. This won’t fix severe damage, but it can help short-term.
Budget-Friendly Fixes That Really Work
You don’t need fancy products or RV-branded upgrades. These solutions are affordable and effective.
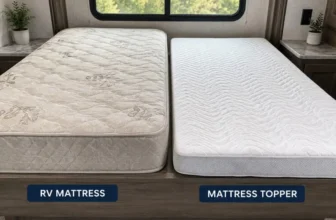
Add a Mattress Topper (Best First Step)
A mattress topper is one of the easiest ways to improve comfort fast.
Best Topper Types for RVs
- Memory foam: Great for pressure relief
- High-density foam: Better for support
Latex-style foam: Sleeps cooler and lasts longer
Ideal Thickness
- 2 inches for mild lumpiness
- 3 inches for deeper sagging
Anything thicker can make climbing into RV beds harder.
Cost
Most good toppers cost between $50 and $120.
Fix the Support Under the Mattress
This step is often ignored, but it makes a huge difference.
Plywood Support
Adding a solid sheet of plywood can:
- Eliminate sagging
- Spread weight evenly
- Reduce pressure points
Make sure it’s smooth and cut to size.
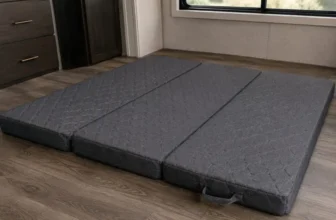
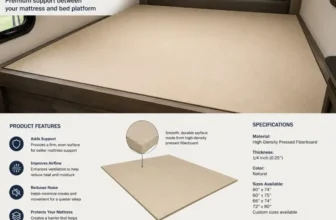
Bunkie Boards
Bunkie boards are thin, firm panels made to support mattresses. They’re lighter than plywood and easier to move.
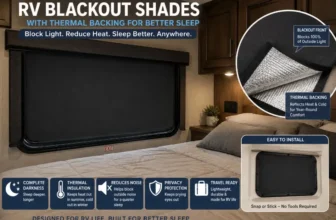
Anti-Condensation Mattress Mesh
A breathable mesh placed under the mattress:
- Improves airflow
- Reduces moisture buildup
- Helps prevent foam breakdown
This is especially helpful in humid climates or cold weather camping.
DIY Foam Layer Fixes (Very Budget-Friendly)
If you’re handy, you can smooth out lumps using basic materials.
Foam Sheet Layering
Buy high-density foam sheets and place them:
- Under sagging areas
- Between the mattress and topper
Carpet Padding Trick
Firm carpet padding can be cut to size and placed under low spots for quick support.
Use a Mattress Encasement
A zippered cover holds all layers together and prevents shifting while driving.
Control Moisture to Prevent Future Lumps
Moisture is a silent mattress killer in RVs.
Why Moisture Matters
When warm air hits cold surfaces, condensation forms under the mattress. Over time, this damages foam and causes uneven wear.
Simple Fixes
- Crack a window at night
- Use roof vent fans
- Run a small dehumidifier when plugged in
Good airflow helps protect your mattress and improves overall RV sleep quality.
When Partial Replacement Makes Sense
If your mattress is badly damaged, replacing just part of it can save money.
Replace the Foam Core
Many RV mattresses are just foam inside a cover. You can:
- Remove the cover
- Replace worn foam with new high-density foam
- Reuse the original cover
Custom Foam Cuts
Foam shops can cut foam to RV-specific sizes, including short queen and narrow beds.
Cost Comparison
- Foam replacement: $150–$300
- New RV mattress: $700–$1,500
Partial replacement often gives better results for less money.
Mistakes to Avoid
Avoid these common errors that waste money and make problems worse.
Buying Soft Toppers Only
Soft toppers feel good at first but don’t fix sagging support.
Ignoring the Bed Base
No topper can fix a bad platform underneath.
Stacking Loose Layers
Unsecured layers shift during travel and create new lumps.
Paying Extra for “RV” Labels
Many RV-branded products are identical to home versions but cost more.
How Much You Should Expect to Spend
Here’s a realistic budget breakdown.
Under $50
- Carpet padding
- DIY foam inserts
- Ventilation improvements
$50–$150
- Quality mattress topper
- Mattress mesh
- Bunkie board
$150–$300
- Foam core replacement
- Combined topper and support upgrades
Spending smart beats overspending every time.
Final Thoughts
A lumpy factory RV mattress doesn’t mean sleepless nights forever. Most problems come from poor foam, weak support, or trapped moisture — all of which can be fixed without buying a whole new bed.
Start with the simplest solution:
- Fix the bed base
- Add support where it’s missing
- Improve airflow
- Upgrade comfort layers as needed