Keeping your RV cool and fresh can be tough, especially in warm weather. Small spaces trap heat fast. Air can feel stale, sticky, and hard to breathe. This makes it harder to relax and fall asleep at night.
The good news is you don’t need expensive gear to fix this. With a few simple DIY cross-ventilation techniques, you can move air through your RV, lower the temperature, and enjoy deeper rest. These tips are easy, low-cost, and perfect for anyone who wants better RV sleep or mattress comfort without running the AC all day.
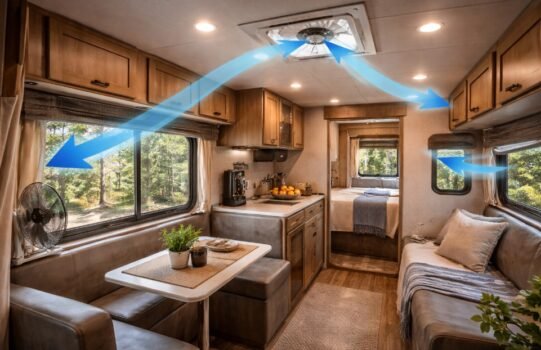
What Is Cross-Ventilation
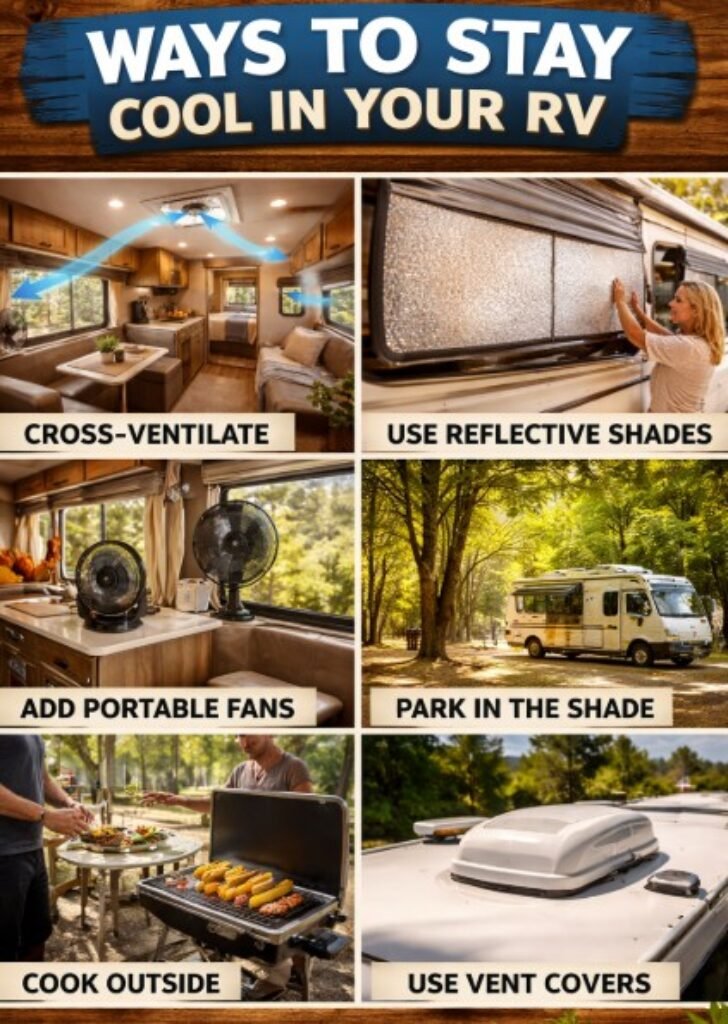
Cross-ventilation is a simple idea. Air comes in from one side of your RV and goes out the other side. This creates a steady flow of fresh air.
Think of it like a breeze moving through your home. When done right, it pushes hot air out and pulls cooler air in. This works much better than opening just one window.
In a small space like an RV, airflow matters even more. Without it, heat builds up fast. With it, the space feels cooler and more comfortable.

Understanding Your RV’s Airflow Layout
Before you start, take a look at your RV setup.
- Where are your windows located?
- Do you have roof vents?
- Is there a door you can safely open?
Most RVs have windows on both sides and at least one roof vent. These are your main airflow tools.
Next, check for things that block air:
- Thick curtains
- Furniture in front of windows
- Closed interior doors
Even small obstacles can stop airflow. Clear a path so air can move freely from one side to the other.
Basic DIY Cross-Ventilation Techniques
Open Opposite Windows
This is the easiest step and often the most effective.
Open a window on one side of your RV and another on the opposite side. This creates a straight path for air to move through.
Try different combinations:
- Front window + back window
- Driver side + passenger side
You’ll feel the breeze almost right away when it’s set up correctly.
Use Roof Vents to Release Hot Air
Hot air rises. That means your roof vent is a powerful tool.
Open a roof vent along with a window. Warm air will escape through the top while cooler air comes in below.
For best results:
- Open the vent fully
- Crack a window on the shady side of the RV
This helps pull fresh air through the entire space.
Adjust Window Openings
Not all windows need to be wide open.
Try this:
- Open the “incoming” window wider
- Open the “outgoing” window slightly
This creates pressure that speeds up airflow.
Also, pay attention to the wind. If the wind is blowing from one side, open that side more to catch the breeze.
Enhancing Airflow with Simple DIY Upgrades
Add Clip-On or Portable Fans
Fans don’t cool air, but they help move it.
Place a fan near a window to:
- Pull fresh air in
- Push warm air out
Small 12V fans work great in RVs. Clip-on fans are easy to move and use very little power.
For better RV sleep or mattress comfort, aim a gentle breeze across your sleeping area.
Install Vent Covers
Vent covers are a smart upgrade. They let you keep roof vents open even when it rains.
This means you can keep air moving all the time, not just in good weather.
They are easy to install and can make a big difference in airflow.
DIY Window Vent Inserts
You can make simple inserts using foam board or mesh screen.
These inserts:
- Keep bugs out
- Help guide airflow
- Allow you to leave windows open safely
This is a cheap and effective way to improve ventilation without major changes.
Advanced DIY Ventilation Ideas
Make a Wind Scoop
A wind scoop is a fun and useful DIY project.
You can use fabric, a tarp, or even a flexible plastic sheet. Attach it near a window to catch the wind and direct it inside.
This works best in open areas where wind is steady.
Upgrade to a Vent Fan
If you want a bigger improvement, consider a powered roof vent fan.
These fans:
- Pull hot air out quickly
- Bring in fresh air from windows
- Use low power
Many RV owners install them as a weekend DIY project. They can greatly improve airflow and comfort.
Add Floor-Level Air Intake
Cool air stays low. If you can bring air in from a lower point, it helps push warm air upward and out.
You can:
- Crack a lower window
- Use a small vent near the floor
This creates a natural airflow cycle inside your RV.
Managing Temperature and Humidity
Good airflow does more than cool your RV. It also helps control moisture.
Too much humidity can cause:
- Condensation on walls and windows
- Musty smells
- Mold growth
Cross-ventilation helps remove damp air and bring in dry air.
In humid areas:
- Keep air moving all day
- Use fans to boost airflow
In dry climates:
- Ventilation helps prevent stuffiness
- Night airflow can cool the RV quickly
Best Practices for Day and Night Use
Daytime Tips
- Park in the shade when possible
- Open windows on the shaded side
- Use reflective covers on sunny windows
- Keep air moving with fans
Nighttime Tips
Night is the best time to cool your RV.
- Open multiple windows and vents
- Let cool air flow through
- Use a fan for steady movement
This can make a big difference in RV sleep or mattress comfort, especially in warm climates.
Safety Tips
- Use window locks or stops
- Avoid leaving large openings unattended
- Use screens to keep bugs out
Always balance airflow with safety.
Common Mistakes to Avoid
Many people try ventilation but don’t see results. Here are common mistakes:
- Opening only one window
- Blocking airflow with furniture
- Ignoring wind direction
- Closing roof vents
- Using fans without airflow paths
Fixing these small issues can quickly improve results.
Budget-Friendly Ventilation Setup Ideas
You don’t need to spend much to stay cool.
Under $50
- Clip-on fan
- DIY window screens
- Reflective window covers
Mid-Range
- Vent covers
- Better portable fans
Higher-End
- Roof vent fan upgrade
- Multiple fan setup
Start small and build your setup over time.
Conclusion
DIY cross-ventilation is one of the easiest ways to improve comfort in your RV. By simply opening the right windows, using vents, and adding a few low-cost upgrades, you can create steady airflow that cools your space and refreshes the air.
You don’t need fancy tools or a big budget. Just a little planning and testing can go a long way.
Try different setups, pay attention to wind direction, and adjust as needed. Even small changes can lead to better RV sleep or mattress comfort and a much more enjoyable travel experience.