 Mike Lee
Waking up to a damp bed is no fun. You lift the cushion and there it is: a wet spot, maybe a little black mildew, and that musty smell that won’t quit. If that sounds like your rig, you’re not alone. And the good news is the fix is cheap and simple.
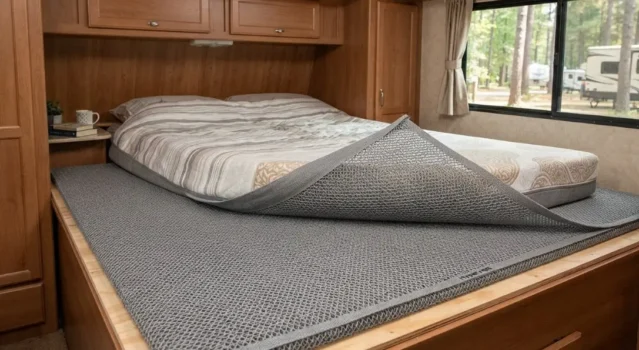
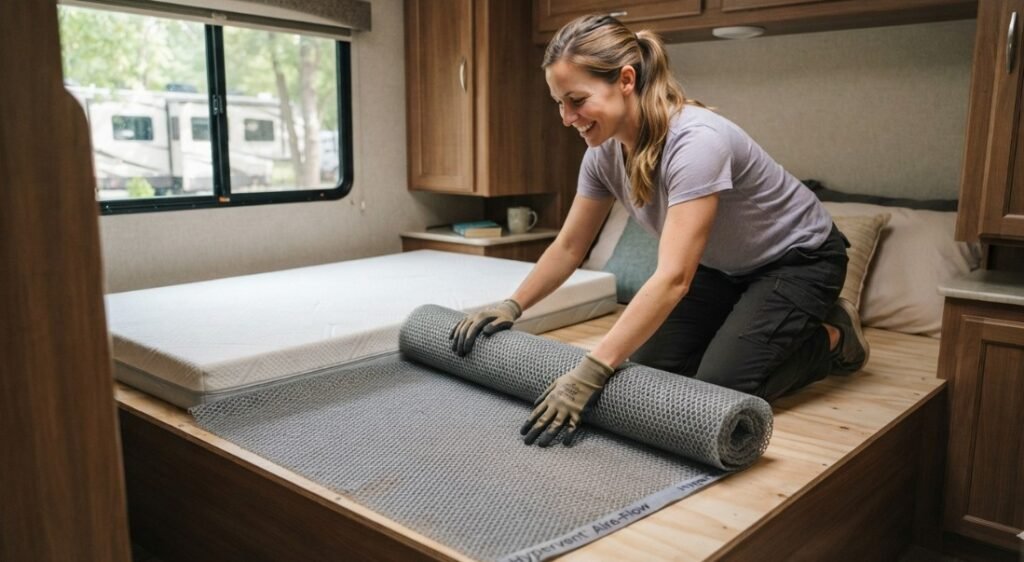
Hypervent Aire-Flow is a springy plastic mat that goes under your bed. It looks kind of like a tangle of fishing line pressed into a sheet. That messy look is the whole point. All those little loops make an air gap so your bedding can breathe.
Below is a plain, step-by-step guide to get it installed right the first time. No special skills needed. Just a free afternoon and a sharp pair of scissors.

What Aire-Flow Matting Does Under Your Bed
Here’s the problem. Your body gives off heat and sweat all night. That warm, wet air sinks down into your bedding. When it hits the cold platform under you, it turns into water. Same thing that happens when a cold soda can get sweaty on a hot day.
That trapped water has nowhere to go. So it sits. And over a few weeks, it grows mold.
The matting solves this by lifting your bedding off the platform. Air can now flow underneath and dry things out. Think of it like the little feet on the bottom of a laptop that keep it from cooking itself.
You’ll see this stuff sold under names like anti-condensation matting or under-bed ventilation matting. It all does the same job.
Tools You Need Before You Start
You don’t need a workshop. Grab these and you’re set:
- Heavy-duty scissors or a utility knife
- A tape measure
- A marker or a piece of chalk
- Your cushions pulled out of the way
That’s really it. The mat cuts about as easily as a kitchen sponge, so you won’t be fighting it.
One tip. Do this job in a decent light. The mat is dark and the cut lines can be hard to see if you’re squinting in a dim camper.
How to Measure and Cut Aire-Flow to Fit
Measure your bed platform first, not your bedding. You want the mat to cover the hard surface your cushion rests on.
Write the numbers down. Length and width. Then add about a half inch to each side. It’s easier to trim a little off than to wish you had more.
Now lay the mat flat and mark your lines with the chalk. Cut slow and steady. If you hit a curved corner, like the ones you find in the bow of a boat or the nose of a trailer, cut a rough shape first. Then set it in place and trim the edges to match.
Don’t stress about a perfect fit. A gap of an inch here or there won’t hurt a thing. The air still moves.
If your bed is bigger than one sheet of matting, no problem. Just butt two pieces together. They don’t need to be taped or glued. Sitting side by side works fine.
Installing the Mat Under Your Camper Mattress
This is the easy part. The mat has two sides. One side is smooth and one side has more open loops. Put the more open side down, against the platform. That gives the air the most room to move.
Set the cut piece on the platform. Then drop your cushion or sleeping pad back on top. Done.
You don’t glue it down. You don’t screw it in. The weight of the bed holds everything in place. If you ever need to pull it out to clean, it lifts right up.
A quick word on thickness. The standard mat adds about three quarters of an inch of height. Most folks never notice. But if your bed already sits high, or you have a slide-out that barely clears, measure your headroom before you buy.
Fixing Condensation and Mold Problems for Good
Let’s be honest about what this mat can and can’t do.
It’s great at stopping the water that forms under your bed. That’s its main job and it does it well. Campers who used to wipe up puddles every morning often find the platform bone dry after a week with the mat in place.
But the mat is one piece of the puzzle. If your whole rig is damp inside, you’ve got other work to do. Crack a window when you cook. Run a small fan. In really wet weather, a cheap plug-in dehumidifier goes a long way.
Do those things along with the mat and you’ll knock out most moisture headaches. Skip them and even the best matting will struggle.
Here’s a simple test. After your first week, lift the cushion and feel the platform. If it’s dry, you’re golden. If it’s still damp, your air is too wet and you need more airflow in the room, not more matting.
Common Aire-Flow Installation Mistakes to Avoid
A few small slip-ups can cost you a good night’s rest. Watch out for these.
Cut the mat too small. People eyeball it and end up with big bare patches. Cover the whole platform for the best result.
Putting it on the wrong bed. This matting shines under beds that sit on a solid, closed base. If your bed sits on a slatted frame that already has gaps, you may not need it at all.
Forgetting the corners. Moisture loves to hide in tight spots. Take the extra minute to trim the mat into corners instead of leaving them open.
Sealing it in. Don’t wrap the mat in plastic or tuck it inside a waterproof cover. That traps the very air you’re trying to move. Let it stay open and loose
Caring for Your Under-Bed Ventilation Mat
The nice thing is this mat asks almost nothing of you. No yearly swap. No fancy cleaning spray.
Every few months, pull it out and give it a shake outside. If it looks grimy, rinse it with a hose or in the tub, then let it dry all the way before it goes back in. It dries fast because, well, that’s what it was built to do.
Check the underside of your bed while it’s out. That’s a smart time to spot any early mildew and wipe it down before it spreads.
Treated right, one mat can last many years. That makes it one of the cheapest upgrades you can make to a camper bed.
Is Aire-Flow Worth It
For most people, yes. It’s a low-cost fix for a problem that can wreck your bedding and your health. A single mat usually costs less than one night at a decent campground.
If you camp in cold or wet places, or you park your rig for months at a time, it’s close to a must-have. If you only camp a few dry weekends a year, you may get by with just good airflow.
Either way, now you know how to measure it, cut it, and set it up the right way. Pull your cushions, grab your scissors, and give your bed room to breathe. Future you, waking up warm and dry, will thank you.